December 31, 2010

Crab Cakes with Lemon Yogurt Sauce


I honestly did not realize how easy it is to make crab cakes at home.  I have ordered them many times in restaurants resulting in some good meals, and well let's just say some not so good.  My husband decided one weekend that he would find a recipe and make them.  He doesn't usually like to be involved in the prep side of things but I was thrilled and stayed out of his way.  The recipe he decided upon originally called for salmon but he thought that crab would make a good substitute.  He was right.

This is his specialty but I convinced him to show me how to make them so that I could put the recipe on my blog.  I have to admit that it was kind of strange being on the other side, but it was a lot of fun.  Usually I am the one showing him how I prepare something.  I do think that I drove him crazy with my need to stop and photograph everything but he was a really good sport about it.


Buying the crab in a container saves a lot of time, but feel free to buy fresh crab and pick it over if you prefer.  When I found the container of pasteurized crab at Costco I was skeptical at first, but after opening it I was amazed that it wasn't the mushy mess I feared, but actual pieces of crab.


We are not huge fans of mayonnaise so I decided to use Greek yogurt in its place.  I actually think that the yogurt is a much better fit because not only is it good for you, but the tang of plays nicely off of the crab.  As a binder, and a coating, we used panko which are a Japanese version of breadcrumbs made without the crusts of the bread.  Panko has a lighter texture and give a nice crispy, golden crunch to fried foods.  The good news is that they are healthier because they tend to absorb less oil.


Although the original recipe states that this makes 4 crab cakes we tend to make them slightly smaller so that we end up with 6-8.  Although they look small they are more filling than you realize, especially if you pair them with a nice salad and maybe some rice.


Crab Cakes with Lemon Yogurt Sauce


Ingredients
  • 1 pound crab meat (I used a container of Super Lump Pasteurized Crab from Costco)
  • 2 cups panko, divided
  • 1 cup plain Greek yogurt (I used Fage), divided
  • 1 large egg, lightly beaten
  • 1/2 teaspoon ground coriander
  • 1/4 teaspoon cayenne
  • 2 tablespoons chopped chives, divided
  • 1 1/2 teaspoon grated lemon zest, divided
  • 1 teaspoon salt, divided
  • pepper to taste
  • 2 tablespoons olive oil
  • 1 teaspoon fresh lemon juice
  • a sprinkle of additional cayenne, if desired
  • lemon wedges to serve, if desired
Preparation
  1.  Preheat oven to 350°F.
  2. In a large bowl mix together crab, 1 cup of panko, 1/4 cup Greek yogurt, egg, coriander, cayenne, 1 tablespoon chives, 1 teaspoon zest, 1/2 teaspoon salt, and pepper. 
  3. Form into 4 round cakes and flatten slightly.
  4. Place 1 cup panko into a shallow bowl and coat the crab cakes lightly.
  5. Heat oil in a 12-inch heavy nonstick skillet over medium-high heat until it shimmers. Cook crab cakes, turning over once (and sides if desired), until golden and just cooked through, 6 to 7 minutes total.  Place in an oven to heat through whilst making the sauce.
  6. Stir together remaining yogurt, lemon juice, salt, chives, and lemon zest. Serve crab cakes with sauce. 
Makes 4 servings (or more if you make them smaller like I did).
Adapted from a recipe found on Epicurious.


December 28, 2010

To Try Tuesday - Vanilla Bean Flan


I always go crazy during the holiday season when all of the baking magazines hit the shelves.  I just cannot seem to resist, even though I tell  myself I really should show some restraint.  There is just something about seeing all of those dazzling cookies, cakes, and other treats that gets my attention every time.

Of the stash I purchased one of them was Popular Plates Holiday Baking - Easy Recipes from America's Great Chefs.  Now whilst I might argue that a few chefs in this magazine might not quite qualify for one of "America's Great Chefs" there were a couple of recipes that I immediately flagged to try.


One of the flagged recipes was for a flan. The recipe is by Ingrid Hoffman from the Food Network. I don't know about you but I love a good flan, and I find it hard to believe that I have never tried making one.  I love the contrasting taste of the deep intense caramel against the creamy silkiness of the custard.  This one was a little different because it had cream cheese in the custard base.  Since I had some left over cream cheese that needed to be used up I decided that this would be my To Try recipe.


Now a heads up for all of you.  Rule #1 - Do not, under any circumstances, get the boiling caramel on you hands or this will happen.

My owie
I am usually so careful about these things, but after wiping up some spilled caramel from the side of a ramekin with a paper towel, the towel accidentally fell and landed on my hand.  I quickly got the caramel off and put my hand under running water but the damage was already done.  Caramel 1, Felice 0.  It was only a small burn so I put aside the dull ache and soldiered on.

Hot bubbling sugar

You will need to move quickly with this caramel because there is a fine line between "golden reddish-brown" and burnt.  I would advise that you take the caramel off just as it is hitting the later stages of golden brown as the pan is still hot and the caramel will continue to cook as you are ladling it into the ramekins.


As per the recipe I let the cream cheese, eggs, and milk all come to room temperature before proceeding.  I found it very hard to get the cream cheese and eggs mixed into a smooth batter.  There seemed to be little lumps of cream cheese in the mix that would just not blend in.  I decided to keep adding all of the ingredients and then check my consistency at the end.  After adding the evaporated milk, condensed milk, and whole milk they were still there so I strained the mixture to remove them before spooning it into the ramekins. Oh, and another word of warning - I was using my KitchenAid, and even with it on the lowest speed, the mixture sloshed everywhere.  I quickly grabbed my shield guard and they helped a little.  Part of me thinks that it might be easier to make these flans with a hand mixer. My ramekins were a little smaller than the suggested 3 1/2-inch ramekins so I ended up with 12 flans.  The more the merrier!

I found that some of my caramel stuck to the bottom of the ramekins as it had hardened like toffee.  To overcome this problem when plating the flans, I boiled some water and poured it in a shallow bowl.  I then ran a knife around the top of the ramekin to loosen the custard, making sure the knife reaches from the top of the flan all the way to the base.  Then dip the bottom of each ramekin in the hot water for about a minute.  Place a serving plate over the top and, whilst holding on to the plate and the ramekin, turn it upside down.  Shake it hard once and the flan should pop out and the caramel will pour over the sides.  I then used the leftover hot water to soak my ramekins because they are a pain to clean with that hardened toffee in the bottom.  Thank goodness this flan tastes so good so I am willing to do the cleanup it takes afterward.


Vanilla Bean Flan

Ingredients
  • 2 cups sugar
  • 1/4 cup water
  • 12 ounces cream cheese, at room temperature
  • 3 large eggs, at room temperature
  • 1 (14-ounce) can sweetened condensed milk
  • 1 (12-ounce) can evaporated milk
  • 1 1/2 cups milk, at room temperature
  • 1 teaspoon vanilla bean paste (or 2 teaspoons vanilla extract)
Directions
  1. Place the sugar and 1/4 cup of water in a medium saucepan over medium-high heat. Using a pastry brush, stir the sugar occasionally, being careful not to get any grains stuck against the sides of the saucepan, until it has all dissolved. Swirl the saucepan every minute until the sugar becomes a golden reddish-brown, about 10 to 15 minutes. Equally divide the caramel into 10 to 12 (3 1/2-inch) ramekins and set aside.
    Preheat your oven to 325 degrees F. 
  2. Using an electric mixer, beat the softened cream cheese with the eggs on low speed to combine. Increase the speed to medium-high and beat until completely incorporated. Add the condensed milk, evaporated milk, whole milk and vanilla paste/extract and continue to beat together until everything is well incorporated, scraping down the sides of the bowl as necessary, about 2 to 3 minutes. 
  3. Ladle the custard over the caramel into the ramekins filling them up to 1/2-inch from the rim. Place a kitchen towel in a deep baking dish or roasting pan and place the ramekins in 2 rows on top of the towel. Place the baking dish in the oven and using a pitcher, pour enough hot water into the baking dish to reach halfway up the sides of the ramekins, taking care not to get water in the ramekins. Cover the baking dish tightly with aluminum foil and bake until the flan is just set, about 30 minutes. When you tap the edge of the ramekin the flan should still wobble in the center. 
  4. Carefully remove the baking dish from the oven, remove the foil and let the ramekins cool slightly. Using tongs remove the ramekins from the water and set on a towel to cool for at least 2 hours before serving. 
  5. Once cooled completely, the flan can be refrigerated for up to 3 days before un-molding and serving. To serve, run a thin knife around the inside edge of the ramekin to loosen the flan, and then invert onto a plate. 
Adapted from this recipe by Ingrid Hoffman.


December 26, 2010

What is your prediction - Food Trends for 2011

Epicurious has come out with their predictions for the top food trends for 2011.  I guess they have a bit of a leg up on the rest of us as they have access to chefs, suppliers, etc and their new trends before the rest of us.  The trick is to see if the public will follow and embrace these trends.

Let's take a look at the predictions:

Food Halls
Will America follow in the footsteps of the food halls of Harrods of London and Paris' La Grande Épicerie with the opening of Eataly (Mario Bataly and the Bastianich family), Food Hall in the Plaza Hotel (Todd English), and L'Épicerie Market (Thierry Perez)?

Korean Cuisine
The Kogi BBQ truck in L.A is wildly popular. Is Kimchi and Galbi in our near future?  Although this isn't a new trend here in Honolulu, will mainland restaurants jump on this bandwagon too?

Macarons
Have cupcakes seen better days?  Are macarons the next "it" dessert?  I know of at least one macaron shop that has opened near me and of course you can order from Gesine Confectionary.  Considering that they are gluten free and melt-in your-mouth-good I can see this trend catching on.

Meatless Mondays & Tofu Thursdays
First we saw eating snout to tail, and while meat is still king, many people are switching up their menus to bump up vegetable and other non-meat product consumption.  The idea of Meatless Monday's is to encourage U.S. consumers to cut their meat consumption by 15 percent for the betterment of our health and the planet.  Will Meatless Mondays and Tofu Thursdays take off?

Foraging
Mushrooms and truffles were once the items that people foraged for.  Now berries, nuts, and wild greens are being sought after. Will the Philadelphia Food Harvest Map be a precursor to new maps produced by foodies "wild crafting"?

Tiki Bar Cocktails
Well this one is right up my alley, although I can't really say this is a trend for me.  It is more a way of life considering my geographic location.  There are a list of Tiki Bars at Tiki Central.  Will people start falling for tropical juices and rum all over again?

Pop-Up Cafés
It started with food trucks, but now chefs are looking at small, pop-up cafes where they can try out new menus, drum up publicity, and save a little on capital outlay.  Chef Tommy Halvorson's Eat Restaurant hold's monthly dinners in different locals that are very popular.  Are insta-restaurants the thing of the future?

Sweet Potatoes
There is no denying that sweet potatoes are both good for you and very versatile, as they can be used in both sweet and savory dishes.  This falls crop was estimated to be a staggering two billion pounds so it is no wonder that they are appearing more and more on dinner tables, both at home and at restaurants.  Even Costco is selling frozen sweet potato fries.  Are they the next big thing or just a flash in the fry-pan?

Urban Wineries
More and more oenophiles are learning the process of making and then bottling their own wine.  Do you dream of seeing your face on a wine bottle?

Pimentón de La Vera
Although it is a relative of paprika,  Pimentón de La Vera is a smoked paprika and it is a specialty of Spain's La Vera region. It has a sweet heat and can be used when roasting and grilling meats, paellas, sauces, and soups.  Is this the new "must have" spice?
 
It is interesting to compare this to their predictions for 2010:
Dish - Fried Chicken
Dessert - Whoppie Pies
Ingredient - Lamb
Health Trend - Eating an immunity-building diet
Profession - Butcher
Drink - Homemade Beer
City - Vancouver
Entertaining Trend - Potlucks
Sex Symbol - Sam Kass

I was reading the January issue of Food and Wine last night and one thing that popped out at me as a new trend was savory cupcakes.  It will be interesting to see which of these trends take off.  Do you have any predictions for Food Trends in 2011?

December 25, 2010

Moloka'i Tiramisu Cheesecake


I know, I know another cheesecake.  I do seem to have a thing for them and I have yet to meet one that I didn't like. They are such an impressive dessert to make, and yet they are really not that difficult to make.  I actually made this Moloka'i Tiramisu Cheesecake for a friend to take to a party a few weeks ago.  My friend called me the day after the party to say that everyone raved about how good it was.  I knew that I had to make another one for my family, and since we were keeping the menu simple for Christmas Day, I decided that this would be the perfect make-ahead dessert.


The recipe was adapted from one I found on the Woman's Day website.  I love to incorporate one of the coffees we have at home from Coffees of Hawaii into my recipes when I can.  This time I decided to use the Moloka'i Malulani Estate coffee which is described as "a rich-bodied, medium roast coffee with a mild acidity, complemented with a luscious hint of chocolate." I definitely wanted that hint of chocolate in my cheesecake.


What I loved most about this cheesecake was that not only did it have a base of coffee-soaked ladyfingers, but nestled between the coffee-enhanced creamy center, there was a second layer of ladyfingers. A little chocolate on top and you are in tiramisu heaven. This cheesecake needs to be made at least a day before serving, but I recommend a few days before so that the coffee flavors really have a chance to develop.


Moloka'i Tiramisu Cheesecake
Printer Friendly Recipe

Ingredients
  • 1 cup triple-strength coffee (reserve 2 Tbsp)
  • 2 Tbsp plus 11⁄4 cups sugar
  • 2 Tbsp Kahlúa (coffee-flavor liqueur)
  • 1 1⁄2 pkg (7 oz each) imported Italian savoiardi ladyfingers
  • 3 bricks (8 oz each) cream cheese, softened
  • 1 Tbsp cornstarch
  • 3 large eggs, at room temperature
  • 1 tub (8 or 8.75 oz) mascarpone cheese (I used the tiramisu flavored mascarpone)
  • 1 oz bittersweet chocolate, grated
  • Garnish: unsweetened cocoa powder and chocolate curls
Preparation
  1. Remove bottom of a 9 x 3-in. springform pan; wrap bottom with plastic wrap. 
  2. Stir coffee, 2 Tbsp sugar and the Kahlúa in a shallow bowl until sugar dissolves. Set 1⁄2 the ladyfingers aside. For each of remaining ladyfingers, quickly dip one side into coffee mixture and place wet side up on pan bottom to cover, cutting ladyfingers as needed to fit. Freeze about 15 minutes until firm. Lift plastic wrap, with ladyfingers, off pan bottom and place on a flat plate in freezer.  
  3. Heat oven to 325°F.  Reassemble the springform pan and coat with nonstick spray.  
  4. Quickly dip one side of reserved ladyfingers into coffee mixture. Place wet side up on pan bottom to cover, cutting ladyfingers to fit and pressing to fill spaces. Freeze until ready to fill.
  5. Beat cream cheese, 1 1⁄4 cups sugar,  and the cornstarch in a large bowl with mixer on medium speed until smooth. On low speed, beat in eggs, 1 at a time, just until blended. Beat in mascarpone and reserved 2 Tbsp coffee. Pour half the batter (3 cups) into pan; spread evenly.
  6. Top with ladyfinger layer from freezer; sprinkle with grated chocolate. Spoon on remaining batter; spread evenly. 
  7. Bake 50 minutes, or until center still jiggles slightly when shaken. (Air bubbles may form on surface; they’ll sink as cake cools.) Turn off oven (leave door closed); leave cake in oven 45 minutes. 
  8. Carefully run a thin knife around the edge of the pan to release the cake (leave the pan sides on). Cool completely on a wire rack. Cover loosely; refrigerate at least 4 hours, preferably 1 day for best flavor. 
  9. To serve: Remove pan sides; place cake on a serving plate. Dust with cocoa; top with chocolate curls if desired. 

    December 24, 2010

    Santa Came Early to Hawaii with gifts from Tate's Bake Shop


    My husband just came in the door with a big box for me.  No, it wasn't from him.  It was from Tate's Bake Shop!  I am so excited.


    I was the lucky winner of a giveaway on Kahakai Kitchen just over a week ago.  The prize was  a Tate's Bake Shop Cookbook and three boxes of Tate's Bake Shop cookies - chocolate chip, white chocolate macadamia nut, and oatmeal raisin.


    It is all wonderful but the best part was when I open the cookbook to take some photos and found that it was actually signed by Kathleen.  How cool is that?


    Thank you so much Deb and Tate's Bake Shop.  Sorry Santa, but these are all mine.


    Mele Kalikimaka me ka Hau'oli Makahiki Hou!


    "What is Christmas? It is tenderness for the past,  courage for the present,  hope for the future.  It is a fervent wish that every cup may overflow with blessings rich and eternal, and that every path may lead to peace."  

    Wishing you all peace and blessings!

    December 21, 2010

    To Try Tuesday - Pumpkin Pineapple Muffins


    Wow, can you believe that it is only five more sleeps until Christmas?  I know how chaotic my life has been lately but I take some comfort in knowing that I am not alone in feeling this way. From reading everyone's blogs I think a lot of us are being pulled in many different directions.  Welcome to the silly season (as I like to call it).


    Considering the time crunch, and the fact that I had half a cup of leftover pumpkin puree from a Pumpkin Chocolate Chip Pound Cake that I needed to use up,  I chose a recipe for Pumpkin Pineapple Muffins for today's To Try Tuesday.  I found this recipe on the Secret Recipe Forum.  Once you have all of the ingredients measured out this will only take you five minutes to get in the oven.  The only changes I made were to use some Penzeys Baking Spice in place of the cinnamon and nutmeg, and to use raw sugar to sprinkle on top rather than brown sugar. 


    Once they were mixed I used a cookie scoop to quickly measure them into the baking cups.  I made them a little smaller than normal and I got 15 muffins from the batter.  I liked the crunch of the raw sugar on the top but the pumpkin totally overwhelmed the pineapple flavor.  If I made these again I would use some finely chopped pineapple rather than crushed pineapple as it would add some texture.


    Pumpkin Pineapple Muffins
    Ingredients
    • 1/2 cup canned pumpkin
    • 1 large egg
    • 1/2 cup milk
    • 4 tbsp melted butter
    • 1/2 cup crushed pineapple, drained
    • 1 1/2 cups flour
    • 2/3 cup sugar
    • 2 tsp baking powder
    • 3/4 tsp salt
    • 1 teaspoon Penzeys Baking Spice (or 1/2 tsp cinnamon and 1/2 tsp nutmeg)
    • raw sugar to sprinkle on top, if desired
    Preparation
    1. Preheat oven to 400°F
    2. In large bowl combine pumpkin, egg, milk, butter and pineapple and stir well to combine.
    3. In another large bowl combine flour, sugar, baking powder, salt and spices and stir thoroughly.
    4. Add to flour mix to pumpkin mix and stir just until moistened.
    5. Spoon into muffin tins. 
    6. Sprinkle with raw sugar, if desired. 
    7. Bake in 400 degree oven for 20-25 minutes.

    Yields 12-15 muffins


    December 20, 2010

    The Cake Slice December 2010 - Cranberry Cake

    The votes are in for December and the cake we would be baking from Cake Keeper Cakes by Lauren Chattman would be a Cranberry Cake.  I did a little happy dance because I love cranberries.  You don't have to twist my arm to use them in both sweet and savory dishes. I tend to over-buy during the season and therefore have bags and bags of them in my freezer.  This isn't necessarily a bad thing because it results in me having cranberries to use throughout the year.

    Before starting a recipe I like to read through it to make sure that I have all the necessary ingredients available and ready to use.  There is nothing worse than getting half way through something special and finding that you don't have what you need to finish.  I have to admit that it has taken me a while to learn this lesson, but now that I have, I have found it invaluable.  For this recipe I discovered that I had whole almonds rather than sliced.  A quick whirl in the food processor solved this problem, and although it would mean the top wouldn't be quite a decorative, it still worked.


    For the first part of mixing the cake batter I used Snow White, my trusty KitchenAid mixer.  When it came time to adding the flour and cranberries I changed to hand-mixing with a spoonula.  Be warned that this cake batter is quite thick and chunky and you won't be pouring it into the prepared pan so much as spooning it in.  Don't worry as this is completely normal for this cake and this is why the spoonula worked so well.  Once the batter is in the pan just use the back of the spoon to smooth the top, and then sprinkle the streusel on top and press lightly.  Although I did not have any problems with the batter leaking, it is a good idea to place the springform pan on a cookie sheet just in case.  I'd much rather clean a cookie sheet rather than the oven.


    My cake was baked in an oven set at 325°F for 1 hour 15 minutes.  I then left it to cool for at least 20 minutes on a wire rack.  I had wrapped the bottom of my springform pan in non-stick foil so that I would have an easy release.  To release the cake I unlocked the side of the springform and removed it.  I then placed a plate on the top and flipped it over. 


    I then gently removed the springform base from the cake and placed my serving platter on the cake.  A simple flip back over again and my cake was almost ready to serve.


    Although it was not called for in the recipe I decided to sift a little powdered sugar over the top for a festive look to this cake.  Just make sure that you wait for the cake to be fully cooled before doing this step or your sugar will melt into the cake.  This cake definitely delivers on both taste and texture, and it is one that I am sure I will be making again and again.  I may even try a little almond essence in the next one I make.

    Click here to check out all of the other Cake Slice Bakers blogs and see their version of this cake.


    Cranberry Cake
    (Printer Friendly Version)
     
    Ingredients - For the Streusel
    • 1 cup sliced almonds
    • 2 tbsp unsalted butter, melted
    • 2 tbsp light brown sugar

    Ingredients – For the Cake
    • 2 cups all-purpose flour
    • 1 tsp baking powder
    • ¼ tsp salt
    • 3 eggs
    • 2 cups granulated sugar
    • ¾ cup (1½ sticks) butter, melted and cooled
    • 1 tsp vanilla extract
    • 1 bag (12 ounces) fresh cranberries

    Preparation - Streusel
    1. Heat the oven to 325°F
    2. Grease a 10-inch round springform pan. 
    3. Combine the butter, almonds and brown sugar in a medium bowl. Work the mixture between your fingers to form large crumbs. 
    4. Refrigerate until ready to use.

    Preparation – Cake
    1. Whisk together the flour, baking powder and salt in a medium bowl. 
    2. Combine the eggs and granulated sugar in a large mixing bowl and beat with an electric mixer on medium high speed until the mixture is lightened and increased in volume, about 5 minutes. 
    3. With the mixer on low speed, add the butter in a slow stream. Turn the mixer to medium speed and beat for another 2 minutes.
    4. Stir in the vanilla.   
    5. Gently but thoroughly fold in the flour mixture, half a cup at a time. 
    6. Then stir in the cranberries. 
    7. Scrape the butter into the prepared pan, smoothing the top with a spatula. 
    8. Sprinkle the streusel over the batter. Bake the cake until it is golden and a toothpick inserted in the center comes out clean, about 1 hour to 1 hour 15 minutes. 
    9. Let the cake cool in the pan on a wire rack for 20 minutes. 
    10. Release the sides of the pan and use a large spatula to slide the cake from the pan bottom onto the wire rack.
    11. Cool completely.  Sprinkle with powdered sugar, if desired.
    12. Store uneaten cake in a cake keeper or wrap in plastic and store at room temperature for up to 5 days.
    Makes one 10 inch round cake


    December 14, 2010

    To Try Tuesday - Roasted Garlic Bean Dip

    Tuesday has rolled around again so quickly and it is officially To Try Tuesday.  Lucky for me I just discovered a new blog ¡Comida es mi vida y mi vida es comida! by Hester.  Her blog is filled with all sort of goodies but the one that immediately caught my eye was the Garlic Bean Dip.  Who wouldn't love a recipe that can be easily made and is good for you too?  It immediately went to the top of my To Try list.

    Lucky for me I had most of the ingredients already in my cupboard and fridge.  I only had to pick up some fresh parsley this morning and I was ready to go.  This is the kind of dip that you could whip up at a moments notice and be eating in a few hours.


    I decided that I wanted to roast the garlic before adding it to the other ingredients.  I love how roasting brings out the sweetness of the garlic and it is so easy to do.  All you have to do is take off some of the outer skin and cut a small portion off the top to expose the cloves.  Put the head of garlic in a small oven-proof container and pour a little olive oil over the top.  Place the container in an oven preheated to 400F and bake for 30-40 minutes, or until it is golden and soft.  Wait for it to be cool enough to handle and then just squeeze the cloves out as needed.


    Roasted Garlic Bean Dip
    (adapted from a recipe by Hester Chang)

    Ingredients 
    • 1 (15-ounce) can of cannellini beans/white kidney beans, drained and rinsed
    • 1 (20-ounce) can of red kidney beans, drained and rinsed
    • 4 tablespoons of plain Greek yogurt
    • juice of one lemon
    • zest from half a lemon
    • 5 to 6 garlic roasted garlic cloves
    • 1/4 cup extra virgin olive oil
    • 1 large handful of parsley
    • 1 1/2 teaspoons salt
    • 1 teaspoon freshly ground pepper

    Preparation
    1. Place all the ingredients into a blender or a food processor and whirl them all together until a smooth consistency is achieved.
    2. Taste the dip and if need be, add some more salt/pepper/lemon juice/yogurt.  Blend it again.
    3. Put it in a bowl, cover with plastic wrap, and refrigerate for a good two hours to let the flavors meld. 
    4. Serve with your favorite ingredients used for dipping such as crackers, pretzels, pita chips, carrots, celery, etc.
    Printer Friendly Recipe 


    December 11, 2010

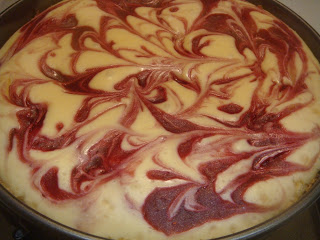
    Cranberry-Raspberry Swirl Cheesecake

    Once I saw the cover of the December Cooking Light magazine I knew I had to make this cheesecake.  The swirls of cranberry on top just looked so enticing and festive.  I love cheesecake and I love cranberries, so this was a match made in heaven.


    I was waiting for just the right time and it presented itself when a good friend of mine asked me to make a few desserts for various parties she had coming up.  Luckily for me she didn't have any preference for exactly what type of dessert she wanted so I told her I knew just the thing to make.


    Since the dessert was for someone else I decided to go with a tried and true New York Cheesecake for the actual cheesecake.  It is from one of my very first cookbooks, Borden's Quick and Easy Desserts, that I purchased when I was living in Toronto, Canada.  The cranberry topping for the Cooking Light recipe listed Chambord (raspberry liqueur) as an ingredient but I really didn't want to go to the expense of buying a bottle.  So instead I decided to add some raspberries and a little port to the cranberries as they simmered.  I really liked this combination of flavors.  The cranberries and the raspberries played really well off of one another, sort of like a sweet-tart flavor.


    When preparing this cheesecake I made the cranberry-raspberry topping first so that it has time to cool. By the time I made the base and filling the topping was ready to be pureed and then dolloped and swirled on the top of the cheesecake.  This is one pretty cheesecake.


    Cranberry-Raspberry Swirl Cheesecake
    (adapted from Cooking Light and Borden's Quick and Easy Desserts)

    Ingredients 
    • 1 1/2  cups  fresh cranberries
    • 1/2  cup  sugar
    • 1 cup raspberries
    • 1/4 cup port
    • 3  tablespoons  water
    • 30 Nilla Wafers
    • 3 tablespoons butter, melted
    • 4  (8-ounce) packages cream cheese, softened
    • 4 eggs
    • 1 (14 oz) can condensed milk
    • 2  teaspoons  vanilla extract
    • 1/3 cup all-purpose flour
    Preparation
    1. Preheat oven to 325°.   
    2. Place cranberries, sugar, raspberries, port, and water in a saucepan; boil. Cook 8 minutes or until cranberries pop and mixture is syrupy. Cool 20 minutes. Place mixture in a food processor; process 1 minute or until smooth.   
    3. Wrap the removable bottom of a 9-inch springform pan with a layer non-stick foil.
    4. Place crackers in a food processor; process until finely ground. Drizzle with melted butter; pulse until combined. 
    5. Press mixture into bottom prepared pan. 
    6. Beat cream cheese until fluffy in large bowl. 
    7. Gradually beat in sweetened condensed milk until smooth. 
    8. Add eggs, flour, and vanilla; mix well. 
    9. Pour into prepared pan. 
    10. Spoon small circles of cranberry-raspberry mixture over filling; swirl together using the tip of a knife. 
    11. Bake at 325° for 50 minutes or until center of cheesecake barely moves when pan is touched. 
    12. Remove cheesecake from oven and run a knife around outside edge to reduce cracking. 
    13. Cool on a wire rack. 
    14. Cover and chill 8 hours.
    Printer Friendly Recipe


    December 07, 2010

    To Try Tuesday - Ka'u Coffee Gelato

    If you read my post from yesterday you know that I am a big fan of the coffee produced by Coffees of Hawaii.  I have been on a quest to try out their products in my desserts.  Although it is To Try Tuesday this recipe was actually made on Saturday because we were having friends over.  However it is a new recipe that I have not made before so I am deeming it eligible for today's post.


    Yesterday was my husbands birthday and he got a Breville Burr Conical Coffee Grinder so that he can grind the Coffees of Hawaii beans just right.  Burr grinders are recommended because they give a more consistent grind by crushing the beans between a fixed surface and a grinding wheel.  Conical burr grinders usually spin slowly and therefore minimize the heat generated via friction, and this keeps the coffee aroma intact.  All of this adds to to even more delicious coffee.


    Along with the Coffees of Hawaii Cheesecake I also decided to make Coffee Gelato.  I had come across a recipe for gelato on the Epicurious website.  I did a little internet research and found out that there is a difference between gelato and ice cream.  Gelato is lower in fat because it is usually made with milk rather than cream.  It also tends to be more dense because it is churned at a slower speed so it does not get as much air in it.


    I ended up making two batches - one gelato and one ice cream - based on the same recipe.  This is such an easy recipe to pull together.  The custard base does need to chill before you put it in your ice cream maker so plan ahead for this.  Also, in hind sight, I would say to make the ice cream as close as you can to serving it because the consistency when it comes out of the machine is almost perfect.  It really only needs to firm up a little in the freezer.  Mine went in for way too long and it was as hard as a rock, even though I took it out prior serving it.  The flavor was still this wonderfully intense coffee flavor.  It was good on its own but I think it would be great in an ice cream sandwich.  I have some cocoa nibs I want to try so I am thinking that I might try making some cookies with them and using the left over ice cream as the filling.  This recipe by Food Gal looks like it would fit the bill perfectly.


    Ka'u Coffee Gelato

    Ingredients 
    • 5 large egg yolks 
    • 1/2 cup sugar  
    • 1 1/2 cups whole milk (or 3/4 milk and 3/4 cream for ice cream)
    • 1/2 cup strongly-brewed Coffees of Hawaii Ka'u coffee (or 1 tablespoon instant espresso powder dissolved in 1/2 cup hot water)
    • 1 teaspoon vanilla

    Preparation  
    1. Whisk yolks and sugar in large bowl to blend.
    2. Bring milk to boil in heavy medium saucepan.
    3. Gradually whisk hot milk into egg mixture; then whisk in espresso mixture and vanilla. 
    4. Return mixture to saucepan and stir over medium heat until custard thickens and leaves path on back of spoon when finger is drawn across, about 8 minutes (do not boil).
    5. Refrigerate until cold, about 3 hours.
    6. Process custard in ice cream maker according to manufacturer's instructions. 
    7. Freeze in covered container.  Recipe can be prepared 3 days ahead. Keep frozen. 
    8. Serves 6.